Removing the Steering Wheel
Article by: Bill Rickard
This article will show you the process I used to remove the steering wheel in my effort to change out the dash bulbs.
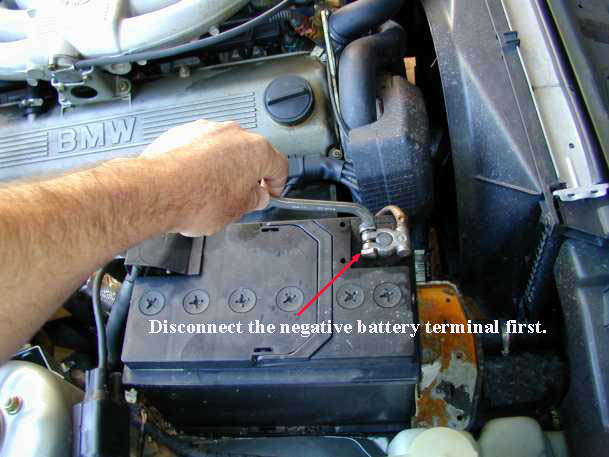
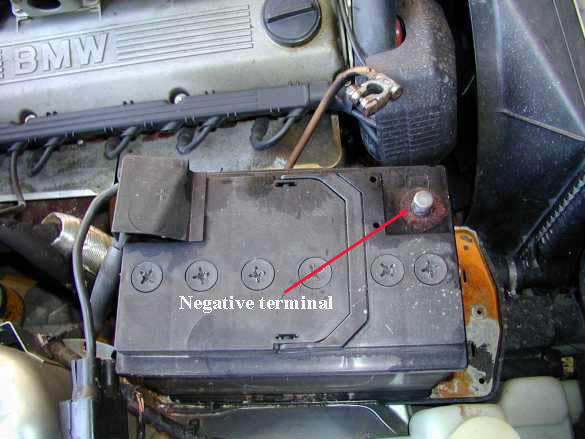
1. First you disconnect the negative battery cable. This is critical.
Make sure you have the code for the radio before doing this!
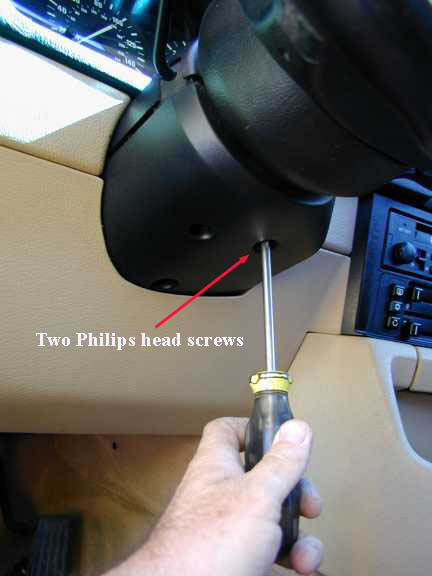
2.
Wait 30 minutes for the airbag to discharge (on cars older than 9/93),
then remove the 2 philips screws that hold the steering column cover on
the bottom.
Make sure you disconnected the battery.
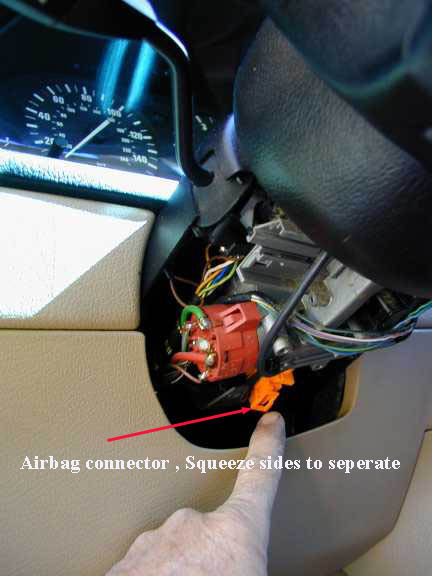
Then you remove the bottom cover on the steering column. When that's removed you will see an orange connector.
That's the airbag connector. Squeeze the clip ends and separate the connector.
Remove the end that goes to the steering wheel from the post its fastened to.
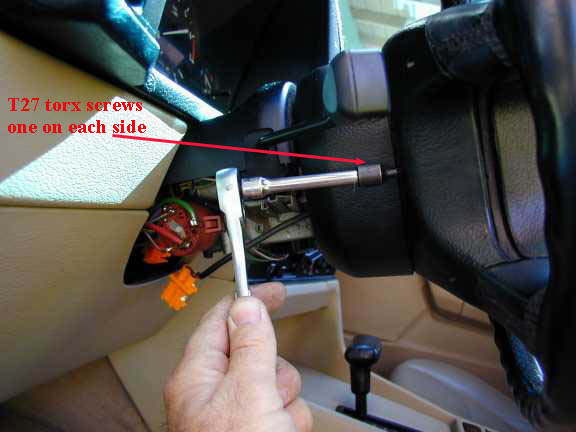
Using a T27 torx socket or driver, then remove the 2 screws on the back of the steering wheel that hold the airbag in place.
Next you carefully lift the airbag
assembly off of the wheel and disconnect the plug on the back. It comes
straight out to remove. Then set the airbag aside in a place where it
won't get disturbed or damaged.

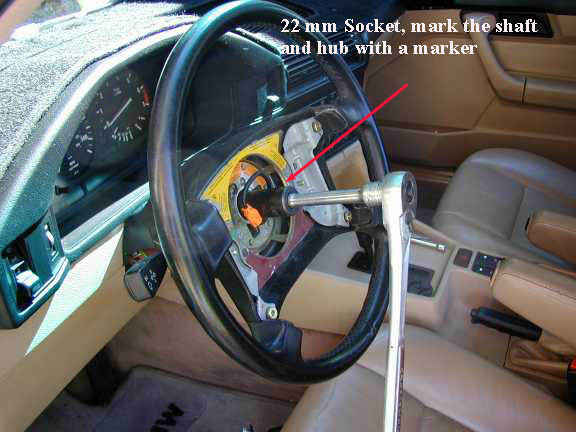
Then you remove the 22mm self-locking
nut that holds the steering wheel on. This nut is to be replaced as it's
only intended to be used once. The torque when reinstalling is 59
ft.lbs. Once that nut is removed, mark the steering shaft and the
wheel with a marker. A line across both so you can put the wheel back on
in the same place. Put the key in the ignition next and turn to the run
position. The wheel will then lift off.
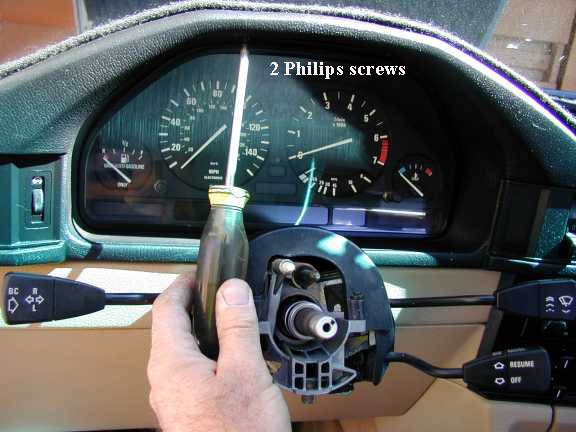
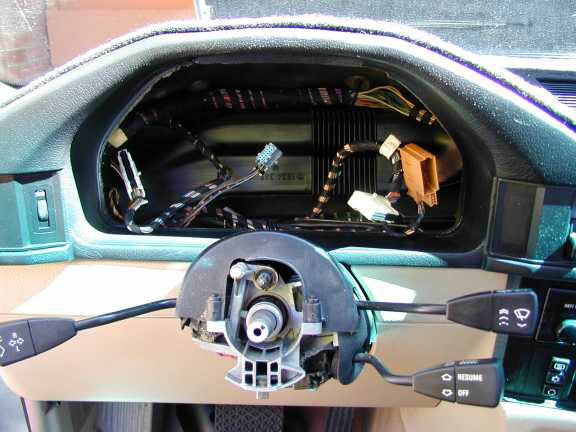
Once the wheel is out of the way you
remove the 2 philips screw that are in the top of the instrument cluster
and carefully pull the cluster out far enough to remove the wiring
connectors on the back. There are little levers you raise to release the
connectors.
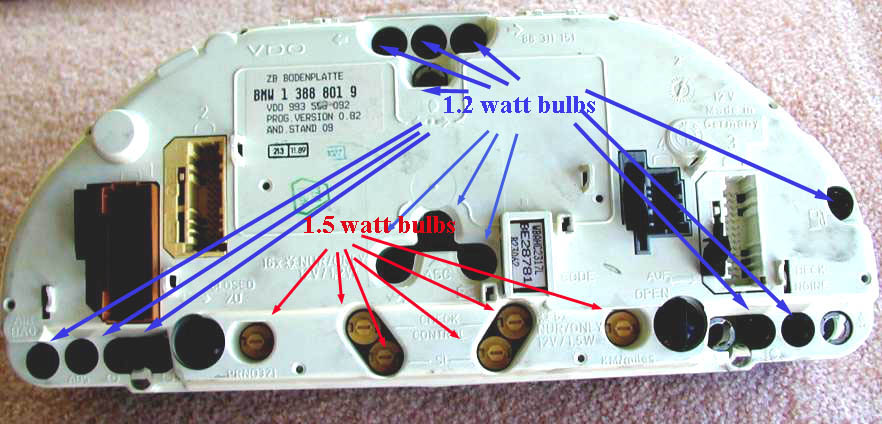
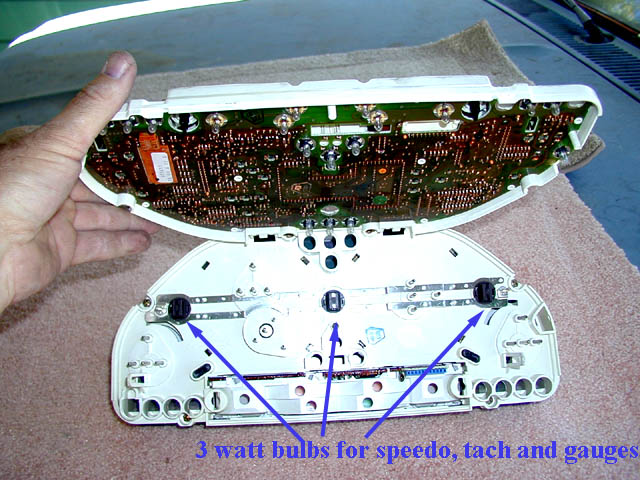
Next lay the instrument cluster down on
a towel or mat to protect the face and on the back is most of the
bulbs. To get to the 3 that provide the main illumination at night you
have to turn the 2 latches counterclockwise 1/4 turn and swing the back
panel up. The rest of the bulbs are on the back panel.
This car was a 1990 525i, it had:
Qty: 6 - 1.5 watt bulbs
Qty: 3- 3 watt bulbs
Qty: 13- 1.2 watt bulbs
The 1.5 watt bulbs I had to get from
BMW, all the rest were available through aftermarket sources.
The 1.5s provide the lighting for the gear indicator on an automatic,
the check instrument display, the service indicator and the odometer.
These are the ones that are on most of the time.
The 1.2s I wasn't as concerned about
changing since they aren't on nearly as much. These are all the warning
lights, turn signals, bright indicator etc.
I changed the 3 watt bulbs since they light the gauges at night.
I think that about covers it all. Then put it back together in the reverse.
BEFORE REPLACING THE STEERING WHEEL MAKE SURE THE IGNITION KEY IS IN AND TURNED TO RUN --
OTHERWISE YOU WILL SNAP THE VERY WEAK STEERING WHEEL LOCK PIN !!
Make sure you don't hook up the battery until the very last.
Turn the key off after the steering wheel is installed, then reconnect
the battery. Otherwise it will trigger an SRS code and have to be reset.
One other note, On most of the other e34 models the battery is under
the rear seat. To gain access just pull up really hard on the front
bottom of the seat. While your in there you can look at the bottom of
the steering wheel where the copper paste is and spread it around if you
have a squeaking problem. A few other notes as well. Some models will
have a nut holding the steering wheel on, some will have a bolt instead.
You don't abolutely have to replace the bolt or nut, you can just use
loctite on it if needed. Also some airbags will take a t27 torx,
some will take a t29 torx.