Source: Nov-1988 750iL, no sunroof, left hand drive, manual rear window blind
Job: replace headliner
Time: say 6 hours, 2 people plus an occasional third
Guidelines:
1. Drop door rubbers from the top and both sides of all doors.
You can leave the lower scuff plates in place.
Drive the fronts seats forward as far as possible and remove the headrests –
they pull straight out – can be stiff.
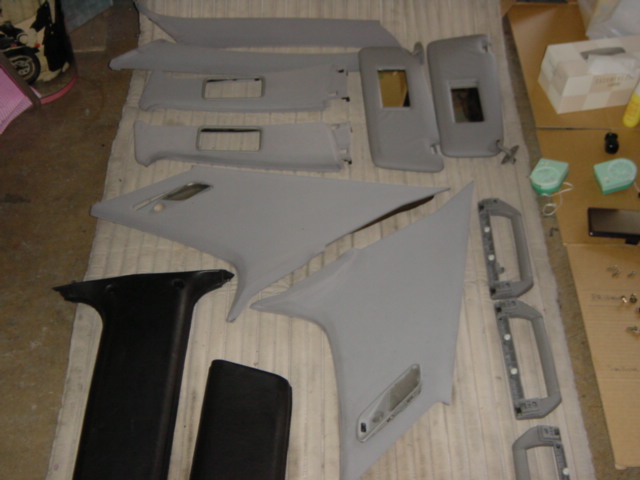
2. C pillar facings
Pull rear seat sidelights from C pillar casing,
rear edge pulls out first.
Though
the space you can see (with torch) the top bayonet clip. Put your hand
in behind the clip and pull straight inwards. This releases the top of
the casing. The problem is that there are two lower plastic clips on
the casing that are brittle and fairly easy to break if you rush it.
The bottom of the casing is strongly pushed by the back seat so
carefully pull the edge of the seat away from the casing and with your
other hand as low down on the casing as possible, pull the casing
upwards at 20 degrees and forward. You should get both clips out intact.
Unplug the side lamp. That's one done now do the other!

fixing a broken C-pillar clip
2. B pillar Lower half casing
Move the front seat forward as far as possible.
With
a small flat screwdriver pop out the two plastic plugs on the lower
half casing. This frees the bottom of the casing. Swing the bottom out
about 10 cm and pull downward. This releases the top of the casing.
Upper half casing
With
the lower half casing off you can see the lower 2 bayonet clips on the
upper half casing. Pull straight inwards. There is another bayonet clip
at the top. Put your fingers behind the upper casing and pull down and
inwards.
Note: the upper metal clip can fall out of its socket in
the roof when you remove the upper casing. Make sure to replace it or
renew it; it’s all too easy to miss this when you’re putting the liner
back in.
3. Remove B pillar upper seat belt mounting nut (17 mm). This allows the casing to drop into the foot well.
Note:
If you want to recover this casing you’ll have to release either the
belt from the seat or release the belt reel from the bottom of the B
pillar. 17mm bolt. We took out the belt reel but now find that the
reassembled seat belts are somewhat slow to retract. If you can clean
the upper casing in the car you will save some time. We were thinking
to replace the covers but they cleaned up really well. Chalk this up to
experience.
4. "A" pillar casing
3 simple bayonet clips
running down the center of the casing. With fingers front and back of
the casing, pull in towards the center of the car. Start with the top
clip, then middle, then bottom.
5. Grab handle mounting screws
Note:
each handle is secured to the board by two small plastic plugs. Do not
try to pull the handles off the board – just remove the mounting screws.
Pull
the handle down and remove the small caps with a small flat
screwdriver. Take out the two nice large cross head screws. This is not
as easy as you might think as the spring retractors tend to load the
headliner board as the screws come out. Three hands are definitely
useful to preserve the board. One person has to hold the base flat
against the board while the other holds the handle down and wields the
driver.
6. Rear vision mirror
Turn
the mirror’s stem and base anti-clockwise about 45 degrees. This should
release the mirror. Remember the feel of it coming off as you will have
to reinstall it later.
7. Remote control switch
With your fingernails pull the remote down and unclip the wiring.
8. Vanity mirror light assembly
As per 7.
9. Main ceiling light assembly
As
per 7. In our case it seemed that it was easiest to remove the
left-hand end first. There is no easy electrical plug at here so leave
the assembly hanging down.
10. Recommendation. At this point –
particularly if you’re working alone – pass two simple straps over the
roof and under the headliner – one through each door opening. Once you
start to release the front and rear board attachments these straps
should stop the board from sagging and breaking. No need to be really
tight.
11. Sun visor base and end clip < 2 damn torx screws each>
The guy who invented these is not my friend.
Regardless,
take out the screws and disconnect the wiring. One novelty of this car
is that everything imaginable (and then some) is wired up. These
electrical fittings are simple spade connectors and can be really tight
– have a small pair of needle nose pliers handy!
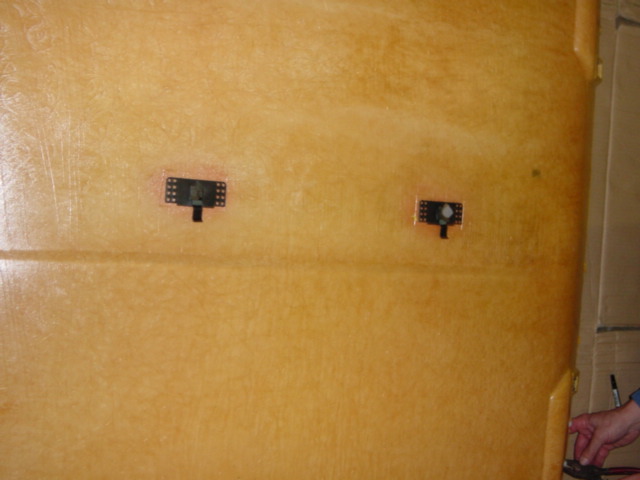
12. Rear window blind holders
Unscrew and remove (for some reason there is no electrical connector)
13. Da board
Work
your fingers between the board and the windscreen. In Shogun’s car the
liner here was stuck to the windscreen sealant. Slowly pressure the
liner material in 4cm sections and it should pull away from the
windscreen.

There are two clips on the rear edge of the board – they are about 5cm
inboard from the blind holders. Put your fingers under the board and
pull down.
The board is now pulled backwards about 10cm which should release the clips in the center of the board.
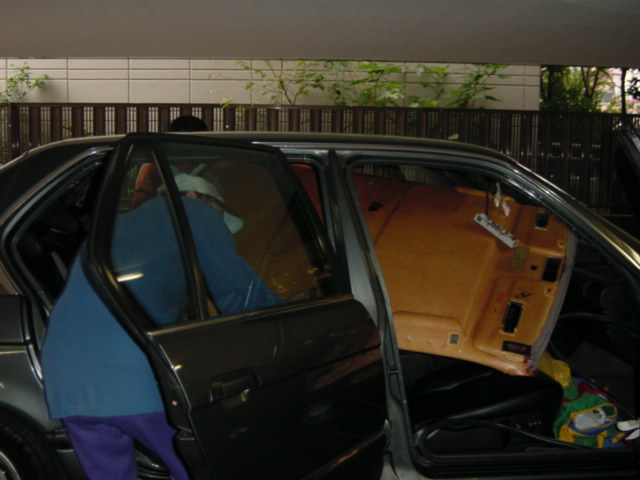
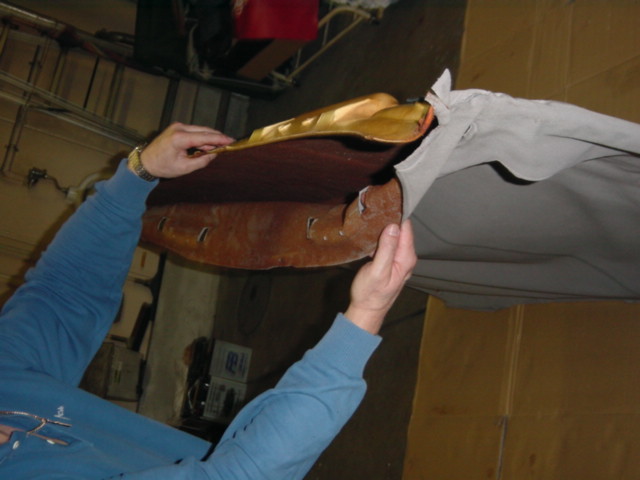
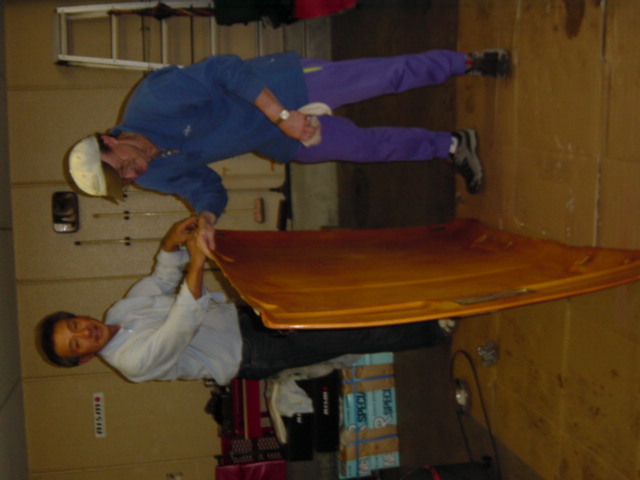
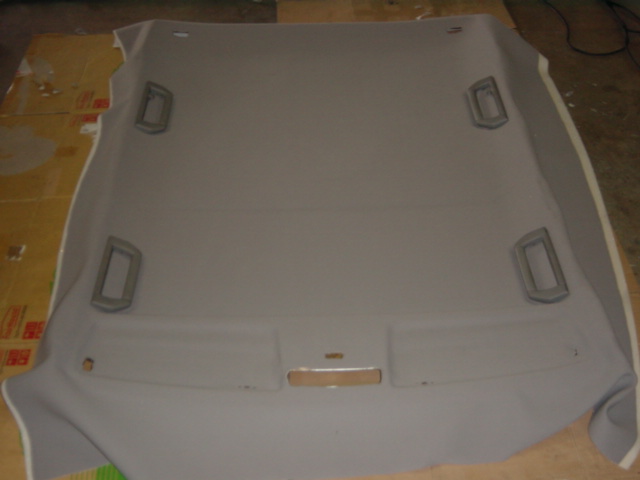
14. Removing the board
We
were quite surprised to find that the board was in excellent condition
and had retained its flexibility -- no cracks in this beauty. This made
it relatively easy to remove -- but two people definitely recommended.
Raise the passenger’s seat up as far as possible and put the driver’s seat as far down as possible.
Release the straps and lower the board.
Get on your 3d glasses.
Turn the board clockwise (looking down on the board) and raise the righthand edge. Move it as far forward as possible.
Raise the driver’s seat all the way. 5 hands would help here.
You now can drop the left side of the board down further.
Slightly
bow the board (particularly the back right corner to get it past the
left C pillar) and drop the back left corner of the board into the rear
foot well.
The board can now be slid out through the rear left door – this is a 750iL after all.
If you’ve been paying close attention you now know how to put it back in again.
Once out of the car, remove the plastic pins holding the grab handles.
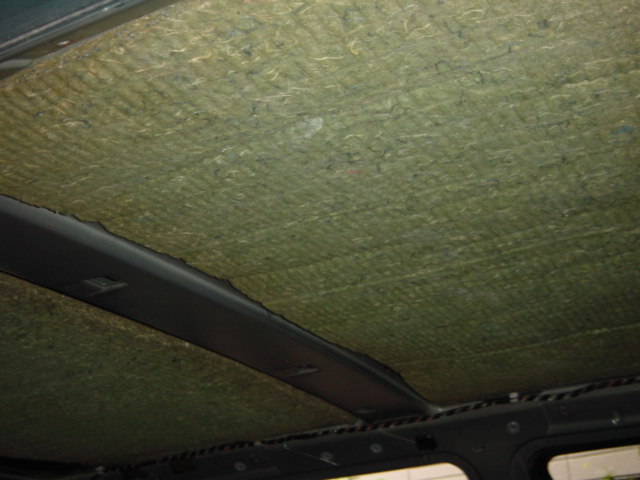
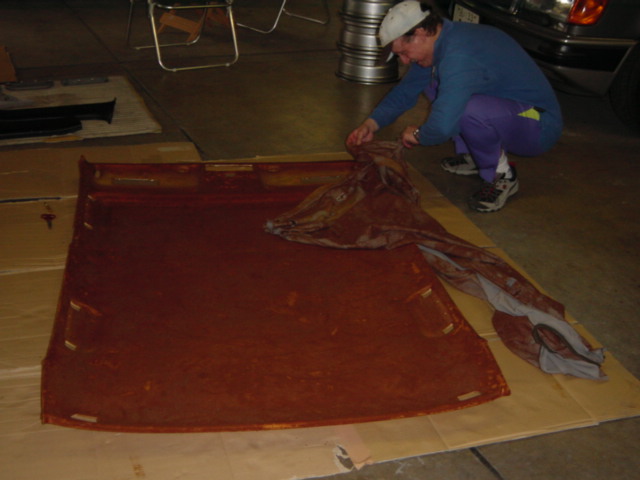
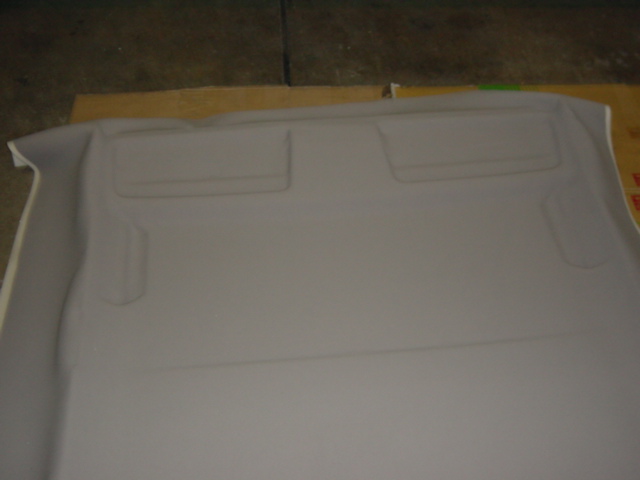
15. Removing the old foam
The old liner should simply fall away from the board. Treat the old foam
with respect. On Shogun’s car the foam turned to difficult-to-remove
sludge if it was pushed or smeared. The best attack was to use a vacuum
cleaner with the small corner nozzle. In most places, simply lightly
dragging the nozzle across the board was enough to remove 99% of the
foam. Stiff scrubbing brushes worked well in the recessed areas. To
prep the surface it seems that steel wool pads with concentrated
detergent worked best. The final surface was really smooth and
tack-free.

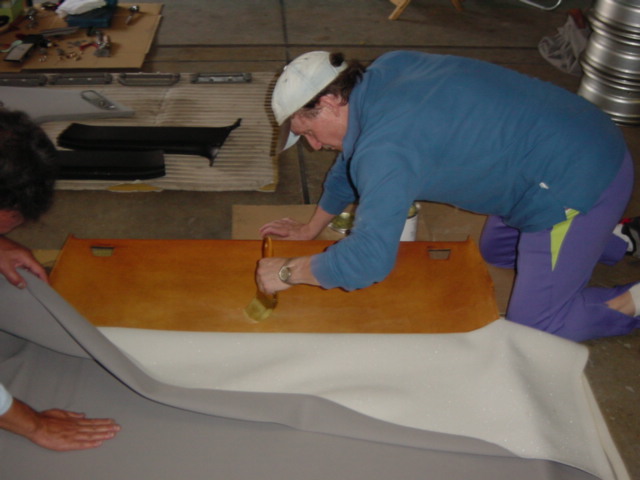
16. Fixing the new liner
Since
Shogun had carefully sized the new stock, we chose the easy way -- glue
first and trim later. The 3M glue Shogun got can be used as regular
direct glue or contact glue. We decided to proceed in strips using it
as direct glue.
With the board flat and the inside facing up, we
laid the new liner out and folded the rear half back. Starting from
roughly the center, we painted the board with glue in 15cm inch strips
from side to side – no glue was put on the edges or backside of the
board.
One problem is that the glue was yellow, same color as the
board. It helps to have another set of eyes checking for dry areas. We
used the glue direct from the can without any thinner. That
necessitated a stiff brush to get good adhesion and a thin even film.
We put down a 50% film, you could see the board thru the glue but only
just. The glue sets quickly and the 15cm strips seem to be good
compromise. Once the glue is down, spread out the liner to cover.
Luckily the glue sets quite quickly so in the cavities of the grab
handles it is relatively easy to push the liner in, hold for 1 minute
and it should stick. We did not tension the liner when we laid it down
and found that there were no wrinkles at the corners (my worry).
Warning: the rear corners are sharply curved and you’ll need care in
using enough glue to ensure that the material wraps smoothly and sticks
well.
The overwraps we left till later. We then did the front half.

Take a break because you’ll have worked up a sweat by now.
It’s essential that you have sharp craft knife and a pair of sharp scissors.
Take it from me, the material we used was damn tough to cut, probably
yours will be the same. One point is that all devices that pass through
the board really require the material to be cut out of the opening –
except the rear blind holders. I tried to cheat by leaving the material
in place but the stress seemed too much. My recommendation is to find
each corner of the opening with your finger, use the craft knife to
make a diagonal cut to the center, and then use the scissors to trim
the sides and ends. WARNING: there is precious little room for error
and it is very easy to cut the opening bigger than needed –trust me.
Keep the liner flat and the scissors vertical as you cut and do not
pull the material as it can stretch a lot. It’s better to be
conservative and cut twice.
For the small holes we used a small pointed soldering iron which melted the liner.
One
of the sun visor cavities was short of glue but when we cut out the
center light opening it was possible to carefully pull the liner away
and use a long thing stick to add more glue. Worked a treat.
We then turned the board over and laid it against some chairs.
Starting
with the rear end, we cut the corner reliefs so that the cuts ended 5mm
inch from the edge of the board. The idea is that when the liner is
wrapped over, the ends of the cuts are slightly past the edge of the
board. Cut the corner piece so it ends about 15mm from the edge of the
board – the width of corner was 5 mm at the bottom. Put down a dab of
glue and fold the corner piece down – hold until the glue sets.
Shogun’s material is as tough as boot leather and there was no worry
about the center piece breaking. We cut the rear liner to a width of 10
cm and folded it over after cutting out reliefs for the rear blind
holders and the two rear clips.
We then cut the material along the sides to a width of 15 mm and glued it down.
The front edge work followed the rear.
Refit the grab handles and hold with the plastic pins.
This design is marginal as the pins fall out if treated roughly.
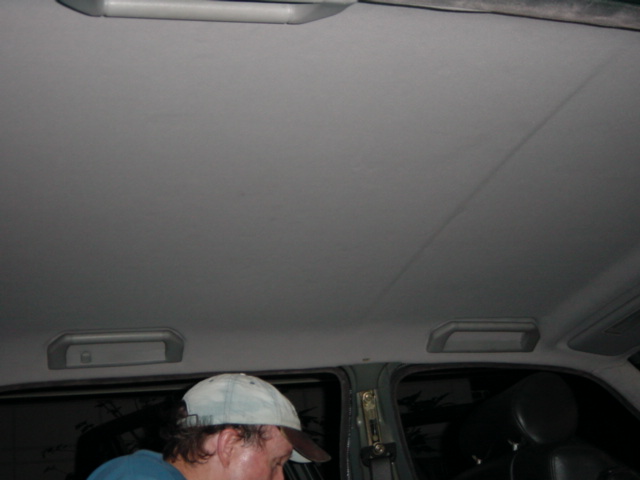
17. Refitting the board
The reverse of removal.
Use the straps to hold the board up as working overhead is tiring and errors can happen.
The
trick here is to engage the center clips and then the rear clips. This
means that the board starts towards the back by about 20 cm, the center
clip holes are picked up, the slides forward past its final position by
about 1cm, the back edge is held up and the board is slid backwards to
engage the rear clips. Phew. 45 minutes of excitement in a few words.
Warning:
the center clips are not too strong and can be broken off if the board
is pushed forward too strongly. Fitting is easier if you turn the car
over on its roof – use a nice blanket to prevent paint damage.
Feed
the center interior light assembly through the hole so its hanging down
again. Feed those wires for the sun visors, vanity lights, and remote
control through the holes.
Refit the grab handle mounting screws.
3 hands needed here as if a plastic pin pops out its real difficult to refit it.
Refit the rear blind holders, and all the stuff at the front.
Note:
the hardest part seemed to be the sun visors and their end clips. It
was very difficult to get the screws lined up and started. I’d
recommend you buy a driver with a comfortable handle – it will give a
lot more control over the screws. Using an awl to line things up first
is really necessary.
Refit the pillar casings and the door rubbers.
You did remember to check that the bayonet clips were still in place above the B pillars before refitting the board, right?
Congratulate yourself.
Shogun is complaining that there is no sunroof -- what a joker!