Home
Fixes - Body

Modify aftermarket trunk shocks to lower costs

The original BMW trunk shocks/pressurized spring are made by Stabilus-Boge,
Gas pressurized spring 490N 51241908431.

Cross Interchange Parts Factory Numbers of some of the various makers
BMW 51241908431
HK G10139
KLOKKE 00597100
FEBI Bilstein 01785
TRISCAN 871011203
STABILUS 1575BV
Magneti Marelli GS0924

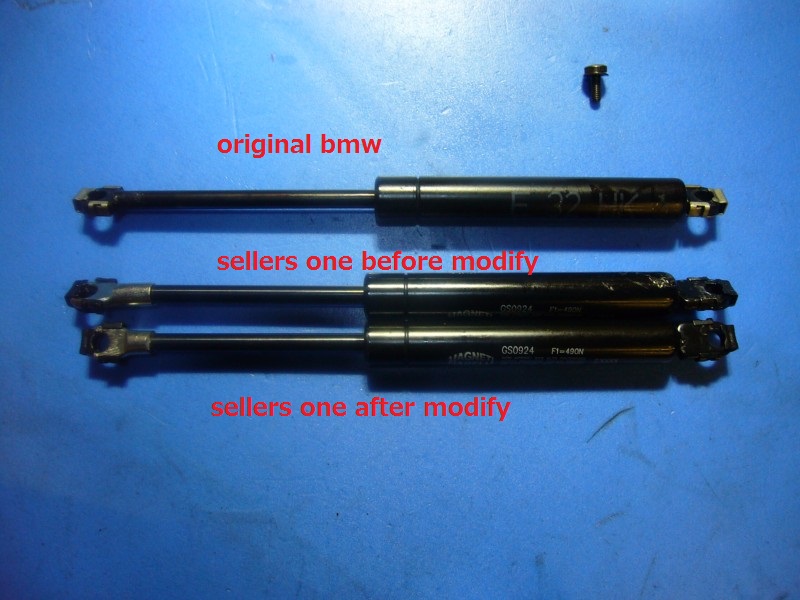
The original ones are of course top quality but also pretty expensive from the dealer or online shops. There are a lot of aftermarket ones available, but I have also read that some are too long to fit. Searching the internet I found Magneti Marelli units at a reasonable price for BMW series 7 E32 and 
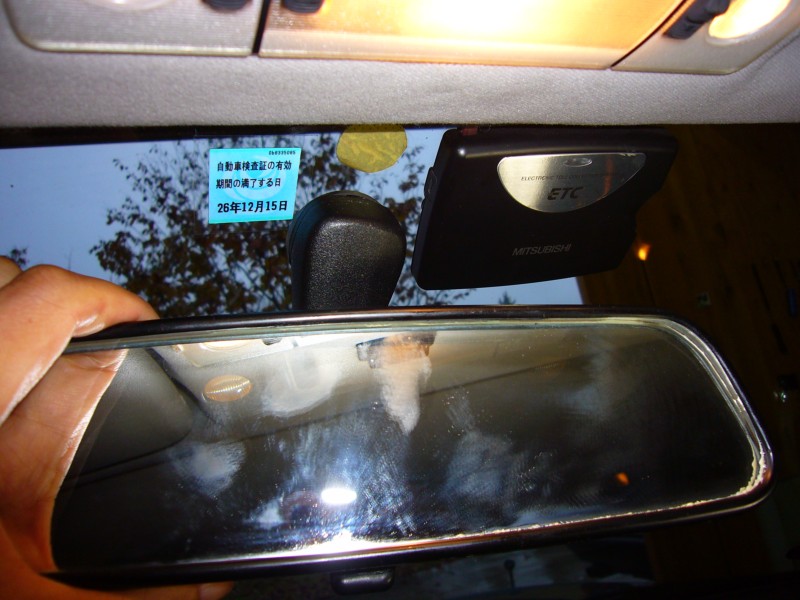
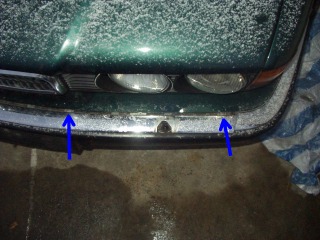
ordered them. Tried to install them. Installed one and the trunk lid could not be closed anymore, it stayed up/open by about 5 cm. Reason was that the rod of the shock hit the end of the damper = the unit is too long. As I had ordered them overseas and paid for the freight, return and making a claim would be a hassle.
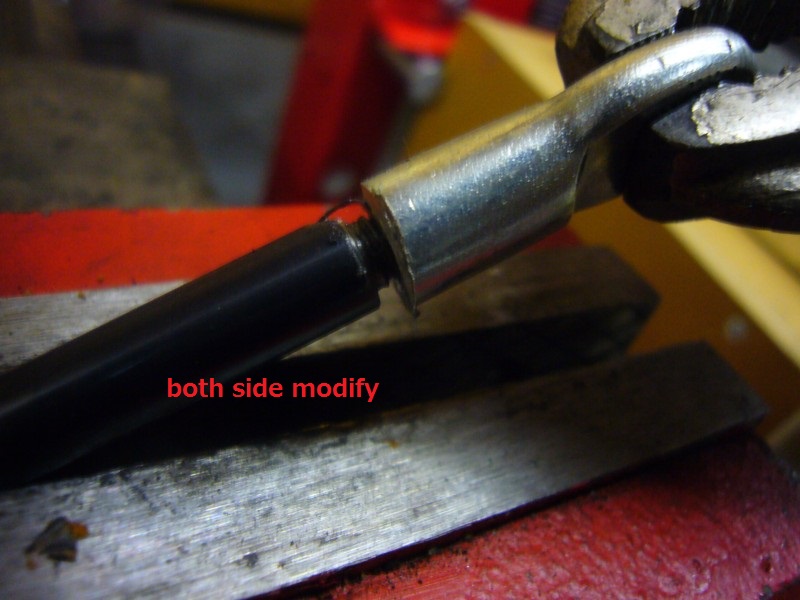
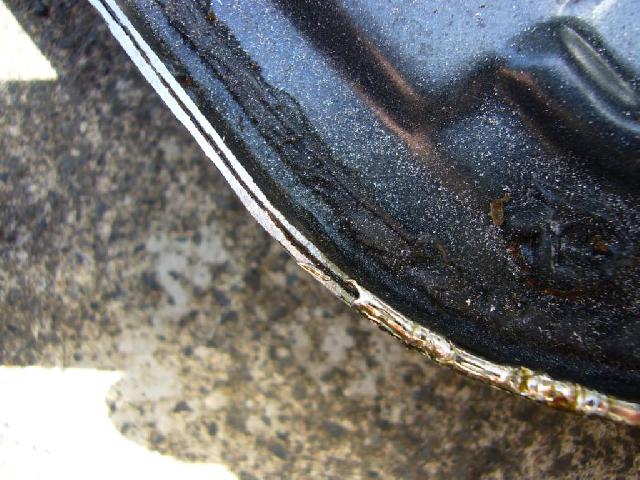
So we modified them./b>
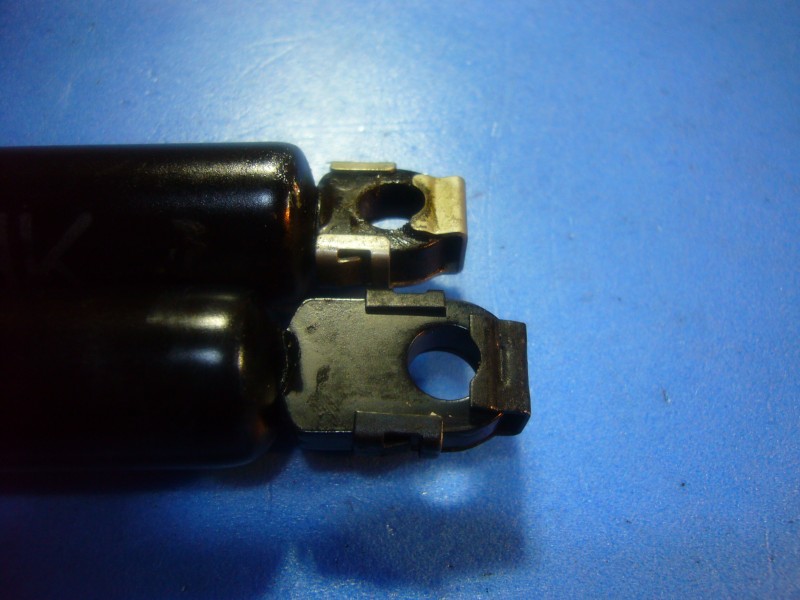
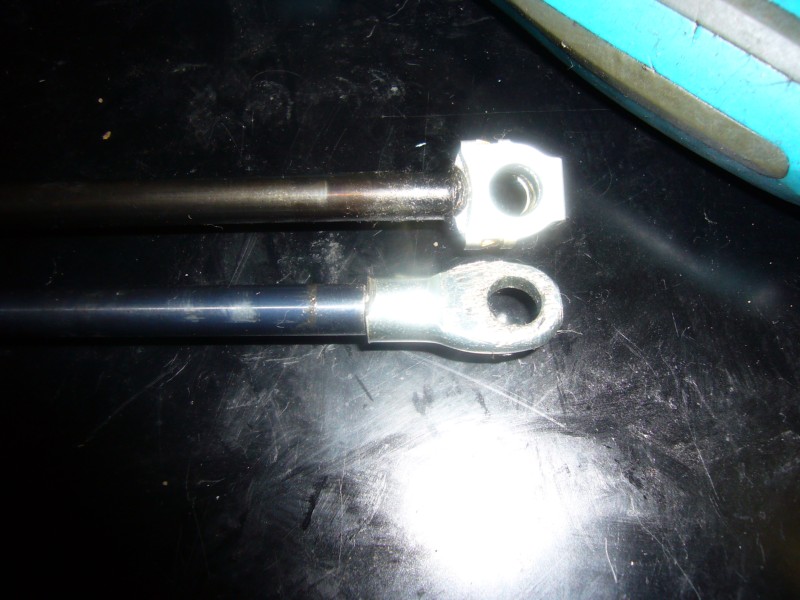
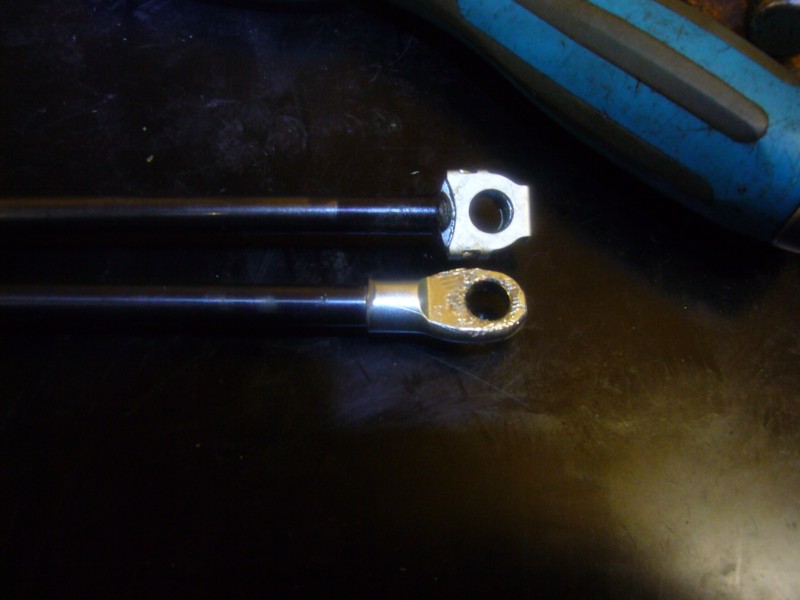
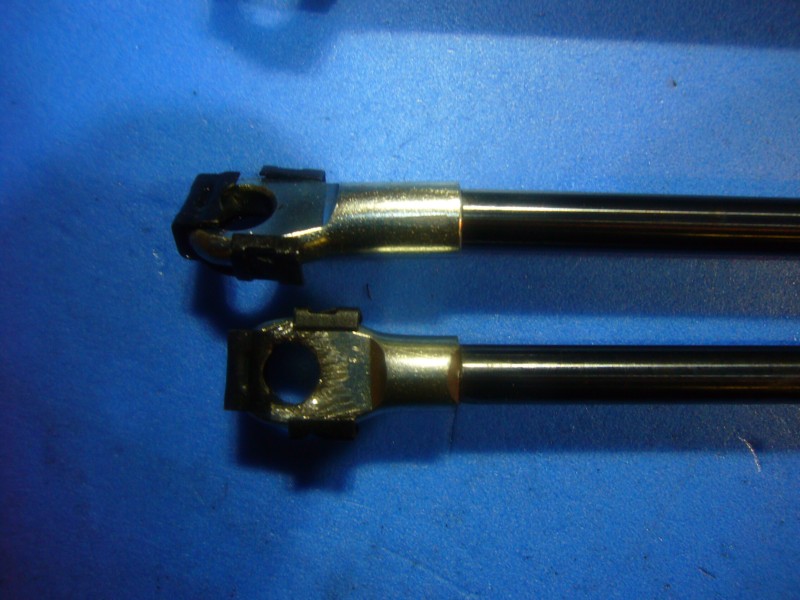
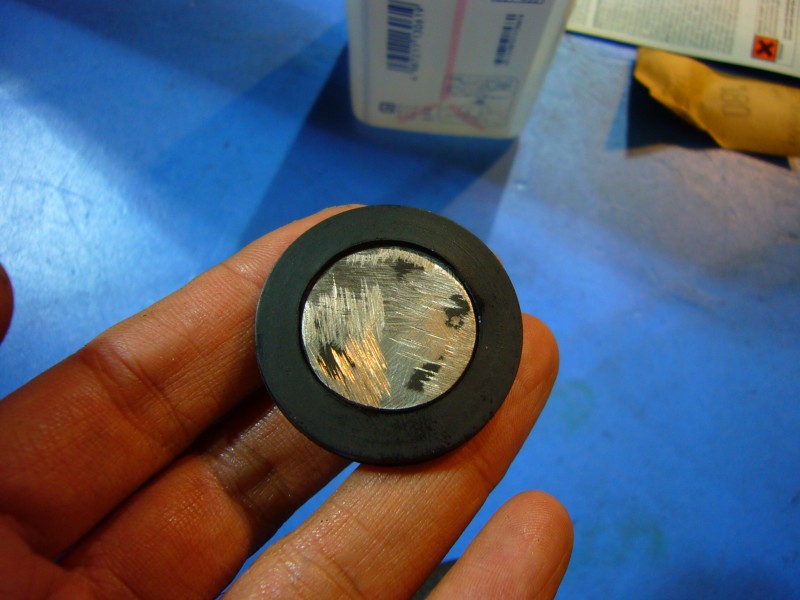
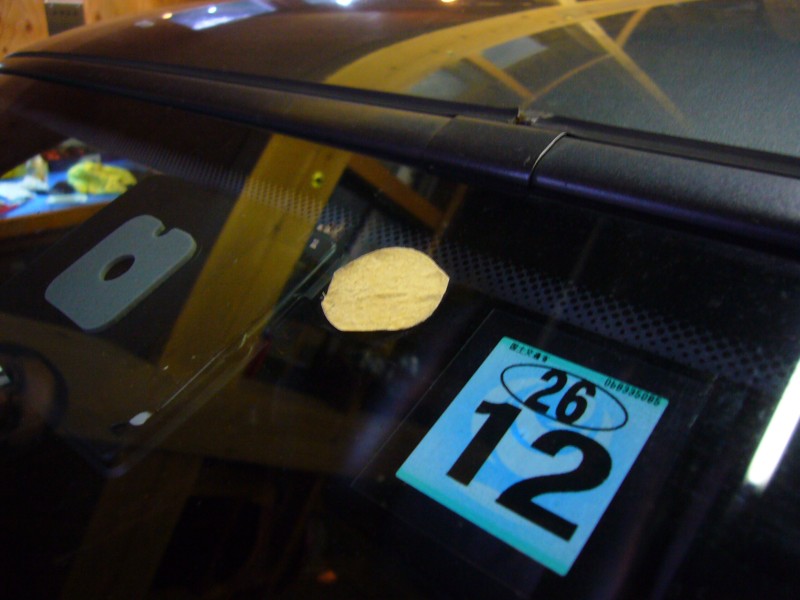
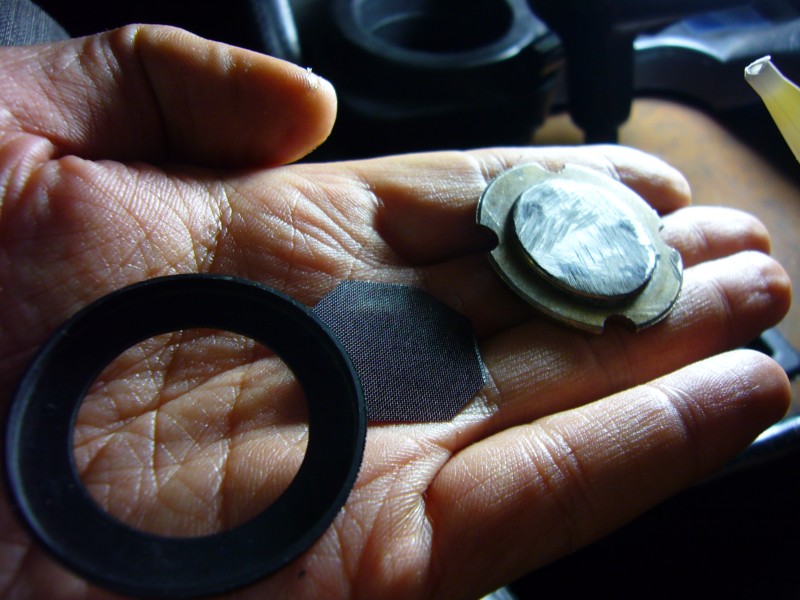
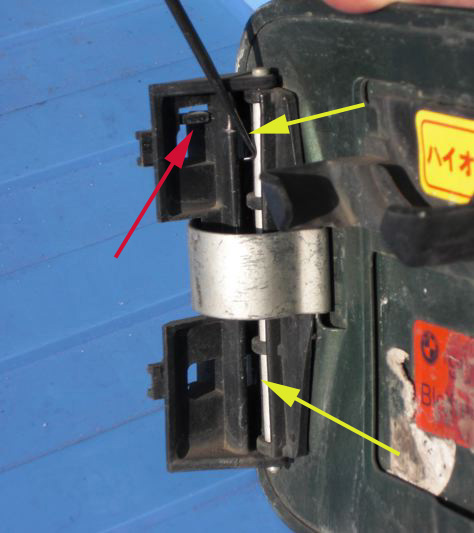
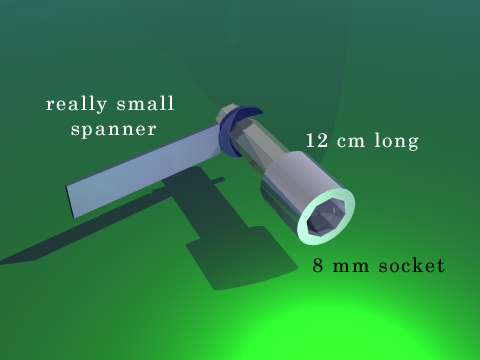
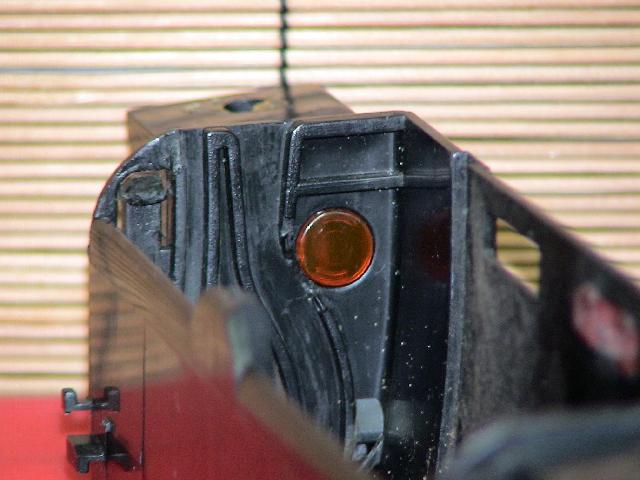
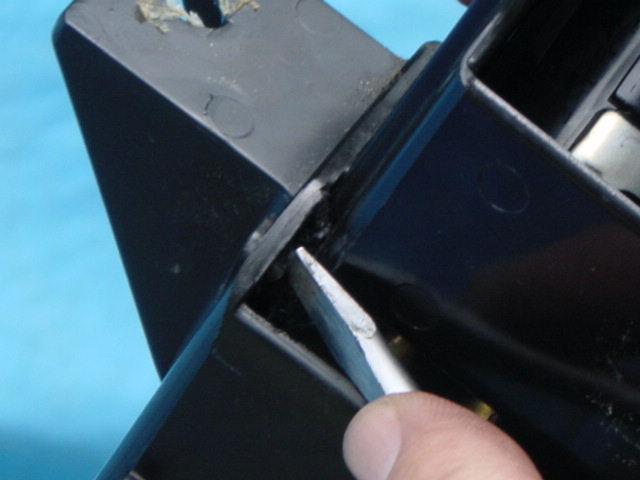
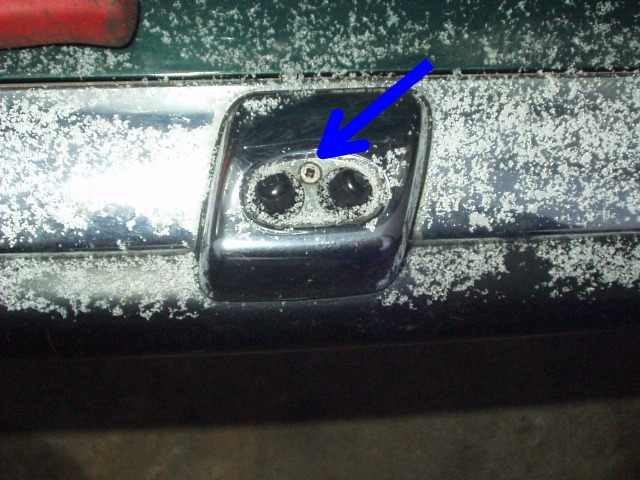
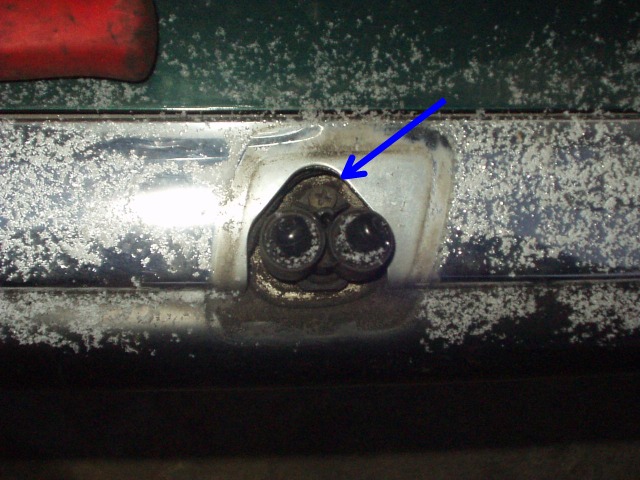
Found out that the mount on the rod is screwed on, so we unscrewed the mounting hook and ground off about 5 mm from both the threaded stud on the rod and the top clip with female thread. 
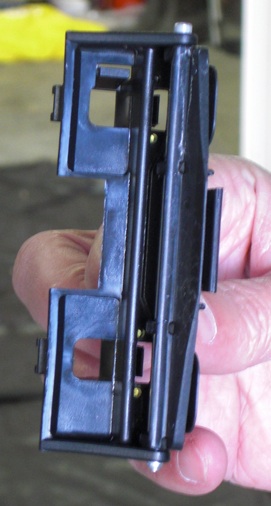
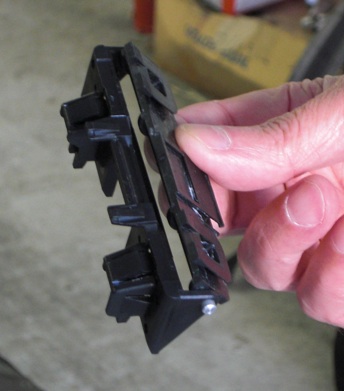
Not all shocks will have the mounts screwed on, some will have them welded.
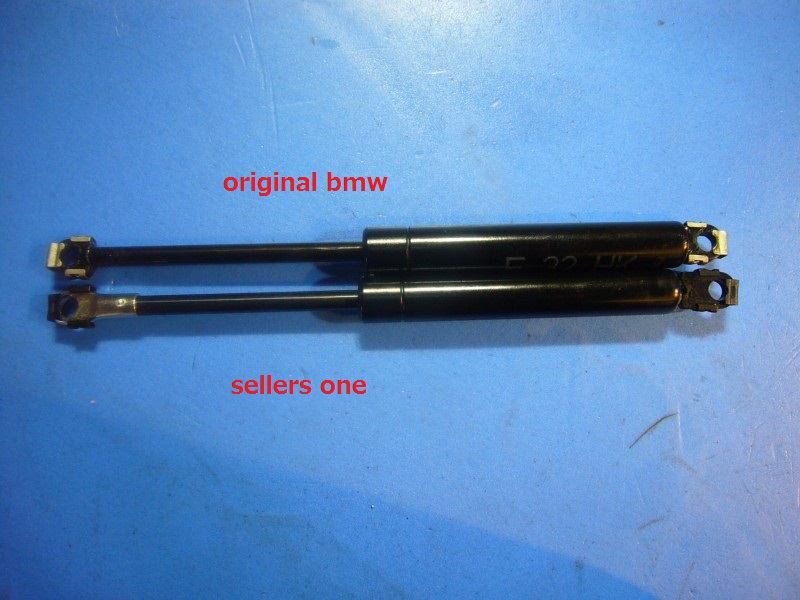
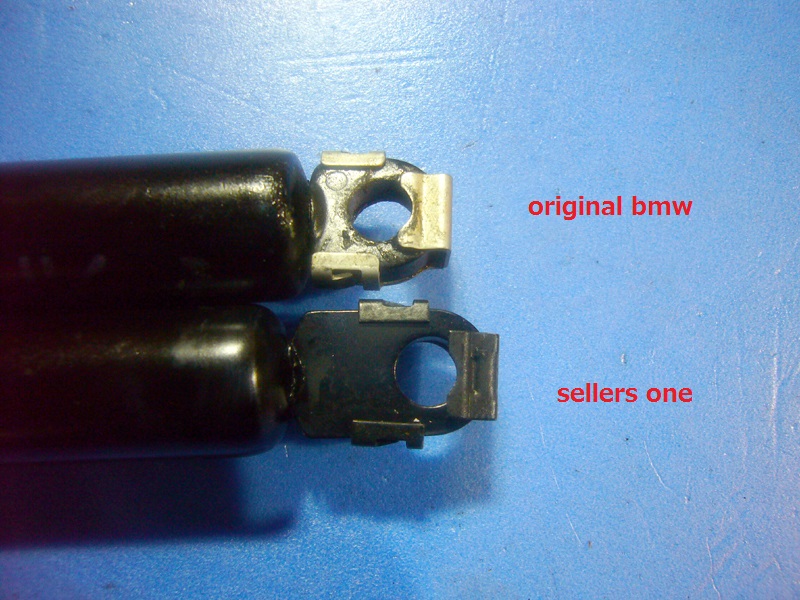
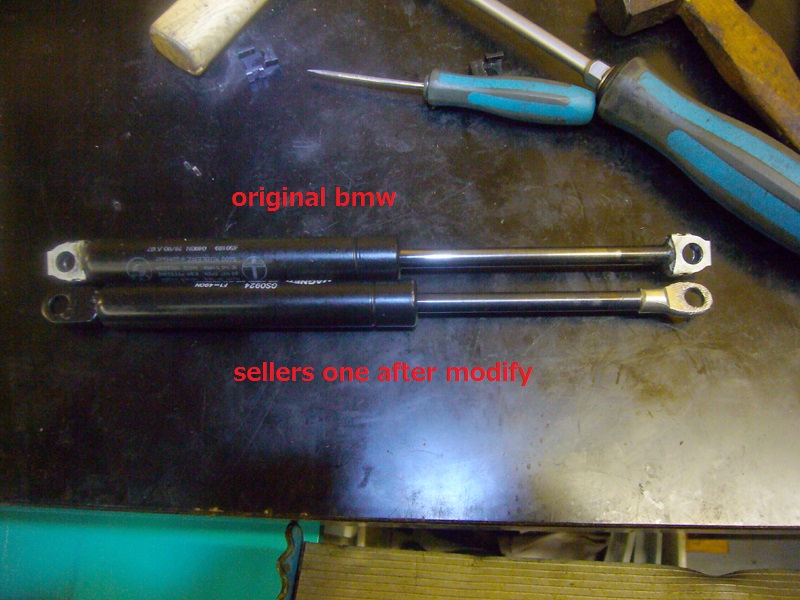
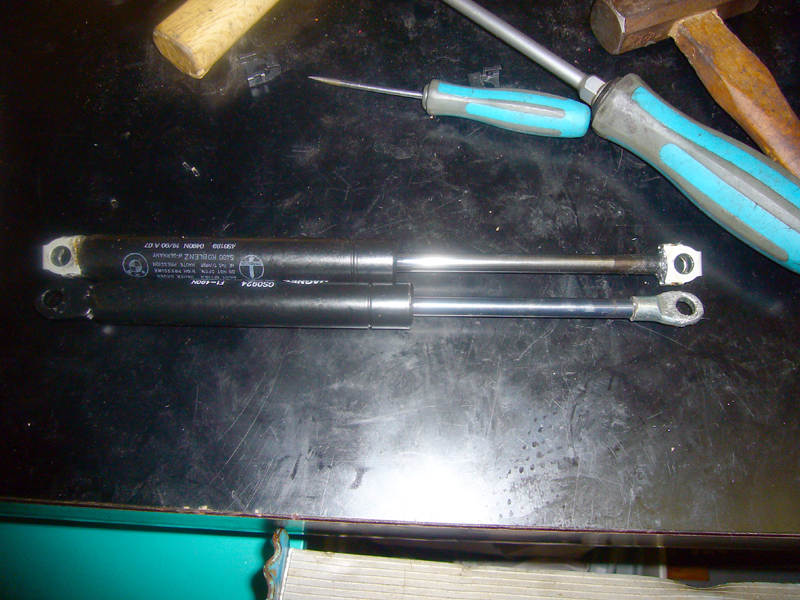
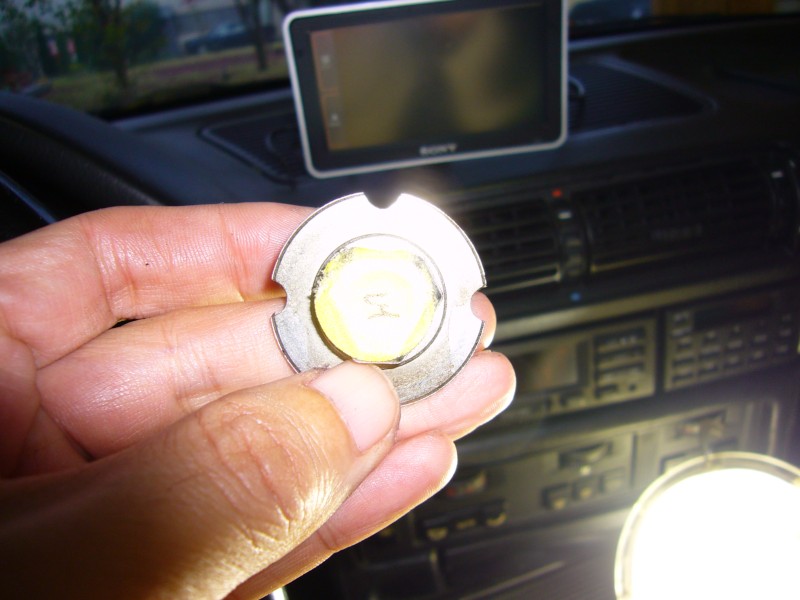
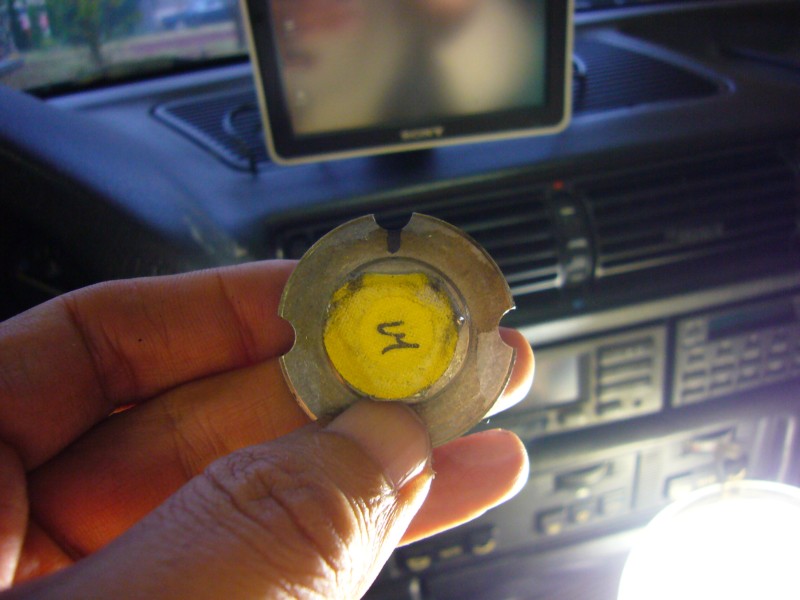
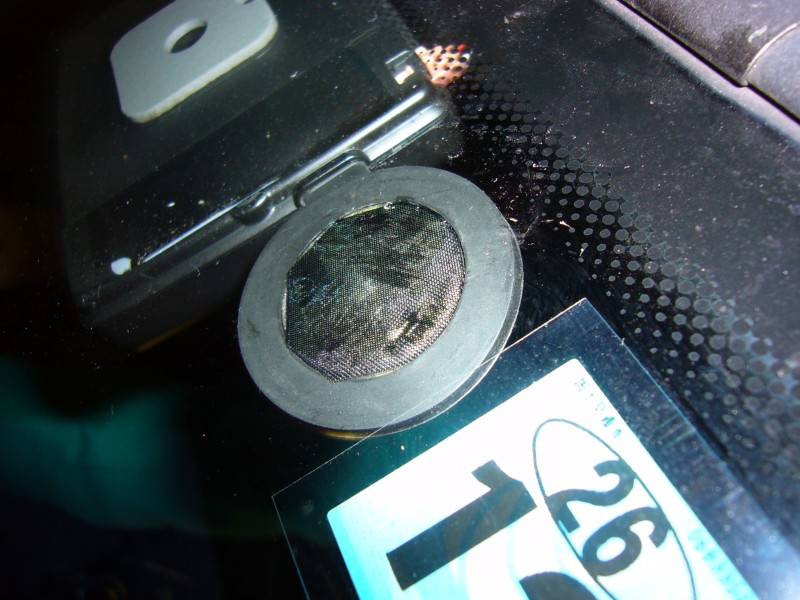
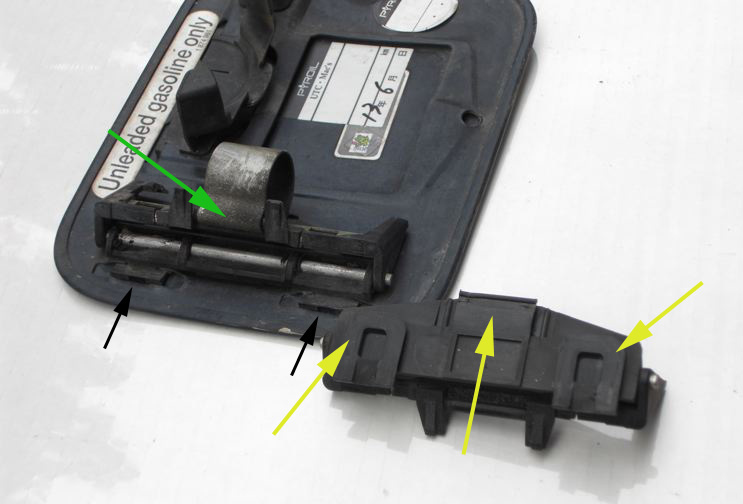
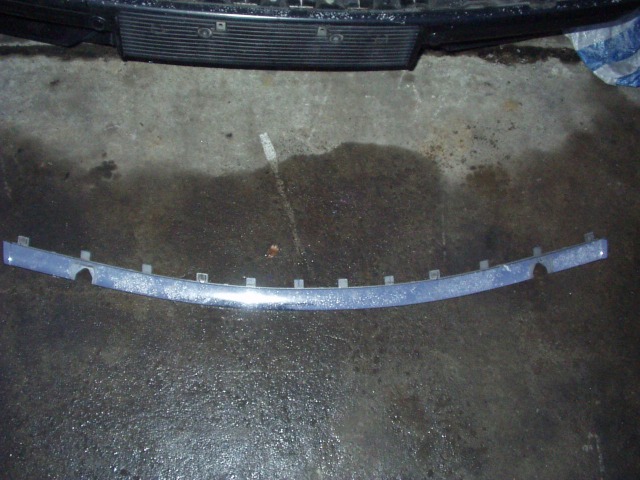
Here are pics before and after and to compare with the original, an original BMW gas shock is also shown.


Jump to top


Reattach rear view mirror to windscreen

The 1988 E32 750iL interior mirror dropped after >25 years, for re-attaching I used Loctite Product 319 Rear View Mirror Bonder.
LOCTITE® Product 319 Rear View Mirror Bonder is a single component, anaerobic structural adhesive for bonding dissimilar materials such as metals and glass. The product cures when confined between close fitting parts with the aid of activator impregnated mesh.
Directions for use - Ensure hands and tools are free from grease and dirt before starting repair.
- Adhesive performs best at room temperature.
- The kit contains a tube of adhesive and an activated mesh.
- Trim mesh to size of mirror or aerial button.
- Remove mounting button (if fitted) from mirror bracket.
- Using a marker pen, mark the exact position of the rear view mirror/aerial on the opposite side of the window.
- Remove all old adhesive on the window and mirror/aerial button with a safety blade or utility knife and ensure that the surfaces are clean and dry.
- Cut the top off the adhesive. Apply adhesive to the button, using the nozzle to spread out adhesive to evenly cover the area.
- In cold conditions adhesize may be difficult to dispence, warm it to room temparature.
- Place adhesive mesh over the adhesive on the button, use tip of bottle to press mesh onto the adhesive allowing mesh to become saturated.
- Taking care to ensure the button is right way up, apply it immediately to the winscreen in the position marked previously.
- Hold firmly in place for at least 30 seconds (1 minute if button and mirror are one part).
- Allow adhesive to set for 15 minutes before attaching the mirror to the button, or adjusting the mirror.

The tricky thing is to find the top of the metal bracket.
On our E32 the mirror is de-/attached by turning the neck of the mirror in the bracket holder by 90 degrees, either clockwise or anticlockwise.
Best is you make a "dry test run" without the adhesive first to know what to do, because once the adhesive comes into contact with the plastic mash with the activator/hardener inside the mesh, you have 30 seconds to attach the bracket before the adhesive gets hard.


Jump to top


Fuel Filler Flap


We found today that you can easily remove the fuel filling flap without breaking the clips!
The flap is held on to the hinge by 2 clips that are integral to the hinge.

First: remove the flap/hinge from the body by releasing three plastic hooks.
What you need is a thin hooked probe, as shown here. The hook here is about 3mm long and is a right angle. Additional photos below.


The hook is placed into the spaces indicated and twisted to release the plastic hooks (yellow arrows) from the square metal mounting plate on the chassis.
It may help to look at the new hinge to see what is needed.
The trick is that you must pull the flap away from the car quite strongly to stop the clips from springing back.
Start with the bottom one, then the top one, and finally the 3rd clip-- red arrow.

For better understanding -- the two clips are shown here more clearly between the pairs of yellow dots -- the moving
hinge part has been turned all the back to open the hinge completely.


And from the "backside" of the hinge.


With the flap off, release the spring from the hinge (green arrow below)
Use a small flat screwdriver to lift up the mounting clips (2 black arrows below) and slide the hinge off the flap.
Lubricate the flap clips of the new hinge with with some silicon dry grease (yellow arrows below) and mount the new hinge.
Remount the hinge to the chassis --- you are done!

Jump to top


Repairing the Sticking Ashtray


Shogun's 89/90 750 had a sticking ashtray.
Here is how we fixed it.
Removing the ashtray assembly
Models: E32 (early models where the lighter raises up when you pull the tray out)
Tools: 8 mm socket and 10 cm hexagonal extension bar that can drive the socket
a really small open wrench that can drive the extension bar
this is what it looks like


1. Remove the IHKA panel
2. Position the socket over the hex heads of the 2 screws and use the spanner to drive the extension-socket assembly
3. Suggest that you bend the arm of the wrench -- not much force is needed to break the 2 screws free.
4. With the 2 screws out, the ashtray assembly can be turned and extracted.
No need to remove the console!!


Fixing the sticking ashtray
Models: E32
Tools: Small flat blade screwdriver and some epoxy putty (putty type and suitable for plastic)

Background: The lighter should rise up when the ashtray is opened. There is a pin on the lighter carrier that follows a track formed on the ashtray case.
Unfortunately, the track is weak right next to an internal light and if it breaks the pin jumps out of the track and jams everything up.
Easy to fix.
This what it looks like broken


1. Remove the ashtray assembly
2. Remove the metal ashtray
3. Pull out the traveling carrier gently -- you may need to raise the lighter with your finger to prevent it from jamming
4. Use the screwdriver to push in the two retainers (at the front on either side at the bottom) on the stationary carrier


5. Clean the broken track and surrounding area with ethanol
6. Mix a very small amount of epoxy putty and roll it into a bar about 3mm in dia and 2cm long
7, Position the bar behind the broken track and press it down till it fills the gap and provides a lot of support.
8. Use the plastic tool that came with the putty to flatten the putty so that it does not project above the level of the original tracks
9. Check that you have a smooth curve on the putty -- wait 30" -- reassemble and enjoy your never-sticking ashtray.
After repair

Jump to top


Clearing the sunroof drains


Q: Have discovered water in the driver's foot well.
On investigation there is dampness in the head lining above the driver's seat. Also there is water soaking in the interior driver's door seal to the front and also water pooling on the thresh hold, again towards the front of the car.
I have read a couple of threads questioning where does the sunroof drain to, based upon similar symptoms.
My question to anybody in the know is:
Clearly the leak is somewhere between the sunroof gutter and the drain pipe which as I understand is routed down the A pillar.
1/ how do you remove the headlining to investigate?
2/ is there a regular fail somewhere in the pipework to look out for?
3/ is it the case that the drain just gets blocked with debris due to age and if so what is the best strategy to clear the block?


A: Have now solved the leak from the sunroof.

The drain pipe was blocked holding water all the way up to the sunroof gutter.
When it rained the gutter filled up and flowed over across the headlining and into the drivers well (no pun intended)

To fix:
VERSION 1: Measure a length of plastic covered wire, sufficient to go the distance from the sunroof gutter to the sill via the A piller + a good bit to tug on. I used 17amp wire which is stiff enough to be pushed down the drain without collapsing and flexible enough to go round the bends.
Gently feed the wire into the drain untill it wont go any further, hopefully the wire has cleared the blockage and is now in the sill.
When I did this a wee drip appeared below the sill but still a bit blocked.

VERSION 2: Take a good length of 6mm soft rubber tube and push gently into the drain. Form an air tight seal to prevent blow back. (I used electrical tape wrapped round the rubber tube).
I use a compressed air cannister which I detached from an air horn, the sort you get at football matches or used by small boats in fog. Prise off the horn attachment and in turn attach the rubber tube and blast the drain. I had instant success. The drain now p#sses like a racehorse!

AFTER: The foot well needs to dry out. There is a covenient drain hole in the battery compartment between the battery and the rear O/S door. (It probably has a rubber tube in it as I think this is a vent for the battery gasses) Any way put the front of the car up on ramps and all the water conveniently drains to the battery compartment, best left for a couple of days, and drains out the vent hole. Used a vax water sucking machine to suck up surplus water through carpet. Got a loan of a small portable de-humidifier unit and ran it for 24 hours to finish the job. Need to make sure the car is as air tight as possible otherwise you'll be de-humidifying the planet!!

Jump to top


Rebuilding seal on the sun roof:


Take's 750iL was raining on the inside! Very wet. He tried clearing the drains but nothing worked. Finally he removed the sun roof and found the edges had rusted so much that the rubber sealing strip no longer worked.


This is the condition that caused the leaks


The rubber seal did not have enough surface to seal against


He used regular solder to rebuild the edge of the sun roof. Problem solved, no more leaks!


Jump to top


Replacing the fog light washer nozzle:


Parts:
Fog Light Washer Jet – 61 67 1 378 616
O-Ring – 64 50 8 390 601

Wait until it is above freezing to attempt this job. There are some small plastic pieces in the washer system in the bumper that may become brittle in the cold and break.

Remove fog light: Pull off trim next to fog light. Pull on the side of the trim nearest the fog light to remove it. Remove top exposed Philips head screw (the bottom one adjusts fog light aim) and remove fog light.

Remove fog light mount bracket: This is attached on one side with two screws that face the car and a plastic ball joint on the other. Remove two screws and pull out ball joint.

You should be able to touch the jet and its mounting nut through the fog light hole. The jet is attached to the bumper with a 19mm hex plastic nut. Before loosening the nut, remove the “L” shaped fitting from the washer jet by pulling it straight up. It snaps on the washer jet fitting so you may need a little leverage to pop it off. All that’s left is to loosen the plastic nut and the washer nozzle will drop out. This is the hardest part of the whole job. First try to get a 19mm crescent wrench on the nut. If this doesn’t fit or the nut is in the wrong orientation, I used a small pair of vise grips. You only need to loosen it a little before you will be able to turn the nut with your fingers. Installation is the reverse of removal.

One risk with the job is that you may end up with a slow washer fluid leak (as I did). I am hoping it is slow enough that it may cure itself. The problem is that the rubber gasket for the washer pump does not provide a good seal to the tank. The passenger side is harder than the driver’s side because there is less room with all the washer fluid lines in the bumper in that area.

Good luck:

Jump to top


Removing the bumpers


Remove with a plus driver the screws holding the covers of the spray nozzles for the headlights


Next the screw holding the nozzles themselves. The nozzles just pop out.


Now pull with your hands carefully the chrome piece on top of the bumper (carefully) a bit at a time till you see the 4 clips


With a minus driver push these clips down carefully (careful, they break easy) and then pull the chrome piece out.


Now remove the 2 main bolts, either torx or inbus type heads, depending on built year.


Now pull with your hands on each side of the bumper and pull the bumper forwars. At the sides the bumper is only in sliders which hold it. No need to remove any screws.
Do not pull the bumper too much forward if your car has headlight and fog lights spray nozzles. Remove these hoses behind the bumper -- the quick release fittings tend to break
so be gentle


Same applies if your car has PDC, remove the 4 connections before you remove the bumper completely.
The rear bumper is basically the same but of course without the nozzles etc.

Jump to top